The Homeowner’s Essential Guide to Spring Maintenance: Checking for Leaks and Sump Pump Installation Needs
Winter's freeze-thaw cycle leaves Long Island basements vulnerable. This spring maintenance guide helps you spot foundation cracks, test your sump pump, and know when professional installation protects your investment.
Share:

Summary:
Winter just ended, but the damage it left behind is just starting to show up. Frozen ground thaws. Snow melts. Spring rains begin. And suddenly, that basement that stayed dry all winter has a puddle in the corner.
If you’re a Long Island homeowner, you know the drill. High water tables, unpredictable storms, and aging infrastructure make basements vulnerable. The question isn’t whether you’ll deal with water—it’s when, and whether you’ll be ready.
This guide helps you assess what winter left behind, test the systems that protect your home, and know when it’s time to call in professionals. Let’s start with what you should be looking for right now.
What Winter Does to Long Island Basements and Foundations
Winter doesn’t announce the damage it causes. Pipes that froze and cracked don’t leak until spring thaw. Foundation cracks hidden under snow become entry points once groundwater rises. Sump pumps that sat idle for months may not turn on when you need them most.
Long Island’s freeze-thaw cycles are particularly brutal. Water seeps into tiny cracks in your foundation, freezes, expands, and makes those cracks bigger. Do that a few dozen times over a winter, and you’ve got a real problem by March.
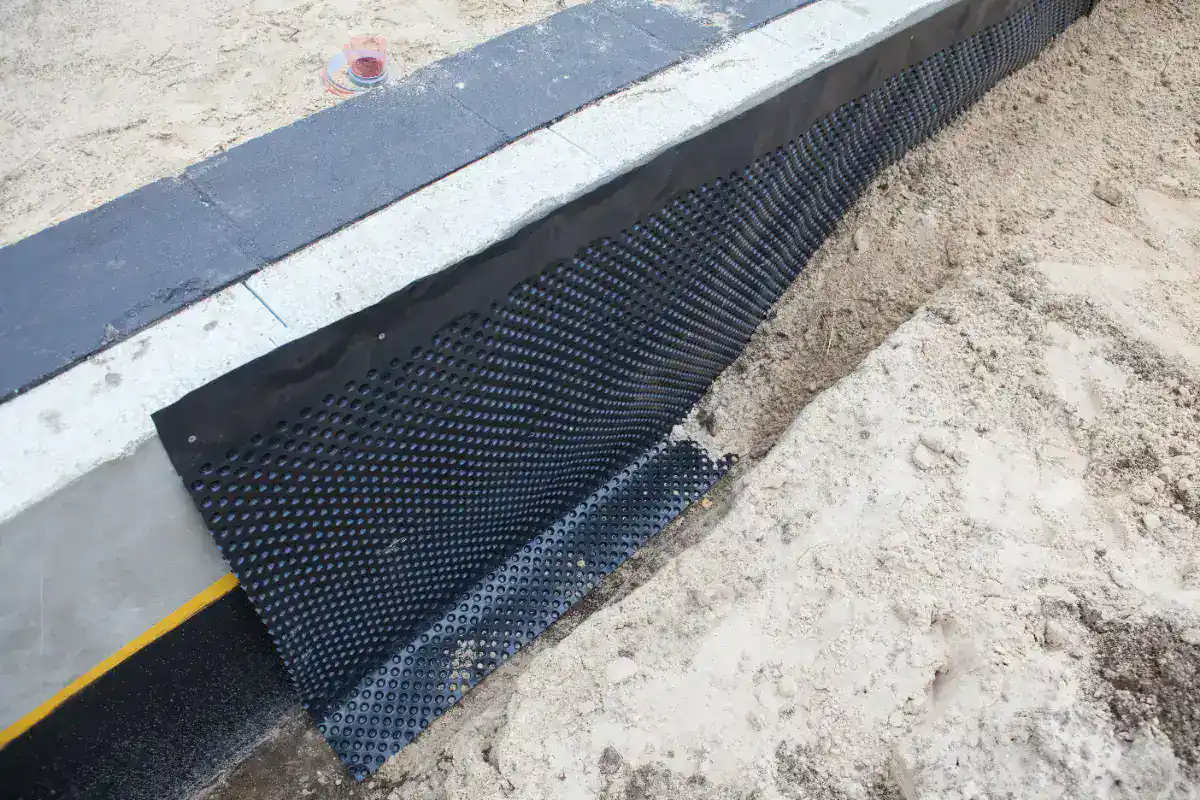
The soil around your foundation shifts too. Sandy soil common on Long Island lets water travel sideways toward your basement walls. Clay pockets trap moisture against the foundation. When spring arrives and the ground saturates, all that water has nowhere to go but toward your basement.
How to Check Your Basement for Post-Winter Damage
Start with a visual walk-through on a dry day. Look at the floor-wall joint where your basement floor meets the walls—that’s where water shows up first. Check for water stains, white mineral deposits, or that telltale musty smell that means moisture has been present.
Run your hand along the foundation walls. Feel for dampness, even if you don’t see standing water. Check corners especially—water collects there first.
Look up at the ceiling and floor joists. Water stains, rust on metal components, or wood that looks darker than it should all indicate moisture problems. If you spot any of this, water has been getting in, even if you haven’t seen a puddle.
Now check your foundation cracks. Not all cracks are emergencies, but you need to know what you’re dealing with. Hairline cracks less than 1/8 inch wide are common as concrete settles. Anything wider, anything that looks like it’s getting bigger, or cracks that run horizontally across walls—those need professional eyes on them soon.
Look for cracks that have white or rust-colored staining around them. That’s dried mineral deposits from water that’s been seeping through. Even if the crack looks small, if water’s been moving through it, it’s a problem that will get worse.
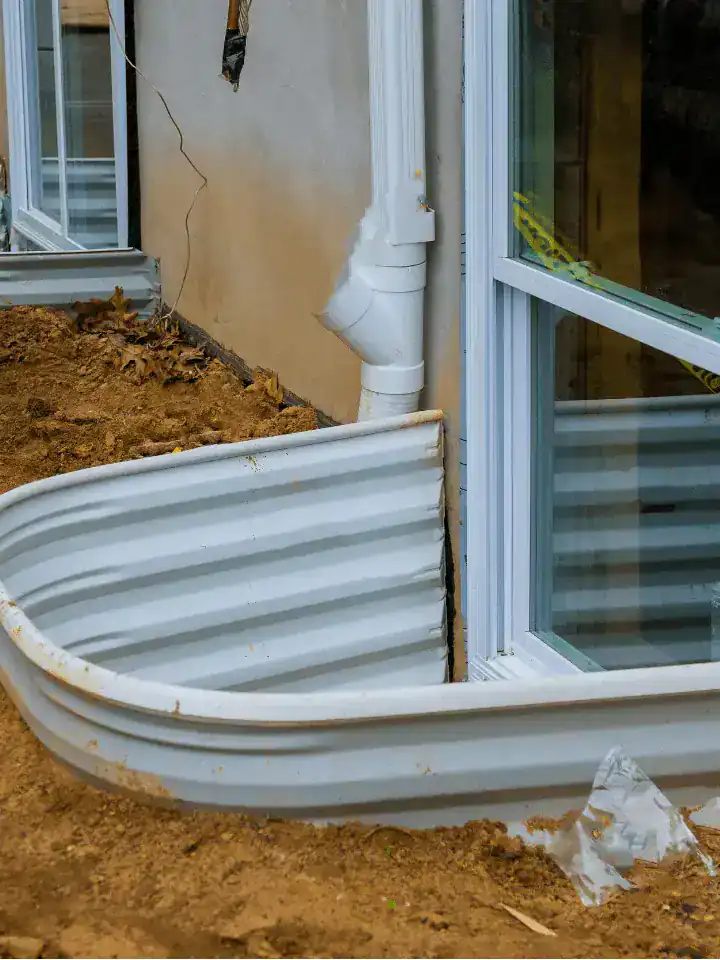
Don’t forget to check around basement windows and where utilities enter your home. These penetrations in your foundation are common weak spots. Look for gaps in the seal, crumbling mortar, or signs that water has been running down the wall.
Pay attention to what your nose tells you. A musty, damp smell means moisture is present even if you can’t see it. That smell often comes from mold starting to grow in hidden areas—behind finished walls, in insulation, or in crawl spaces.
Finally, check your exterior foundation from outside if you can access it. Look for cracks, gaps where the foundation meets the house framing, and areas where soil has settled away from the foundation creating gaps where water can collect.
Signs Your Foundation Needs More Than a DIY Fix
Some foundation issues you can monitor. Others require immediate professional attention. Horizontal cracks are more serious than vertical ones—they often indicate pressure from the soil pushing against your foundation wall. If you see horizontal cracks, especially if the wall looks like it’s bowing inward even slightly, call a foundation specialist soon.
Stair-step cracks in concrete block foundations follow the mortar joints and indicate settling or lateral pressure. These can start small but often grow quickly once they begin. If you can fit a dime in the crack, it’s time for a professional assessment.
Multiple cracks in the same area, or cracks that seem to be growing, suggest active movement. Take a photo and check again in a few weeks. If the crack has widened or lengthened, that’s active foundation movement that needs addressing before it gets worse.
Water actively seeping through cracks during or after rain is a clear sign the crack has penetrated through the foundation wall. Even if the crack looks small from inside, if water’s coming through, it’s a full-thickness crack that needs proper sealing and likely interior drainage to manage the water pressure behind it.
Look for signs of previous DIY repairs that have failed. If you see old caulk or hydraulic cement that’s cracked or separated, that means the underlying problem wasn’t addressed. Simply filling a crack from the inside rarely works long-term because it doesn’t address the water pressure pushing against your foundation.
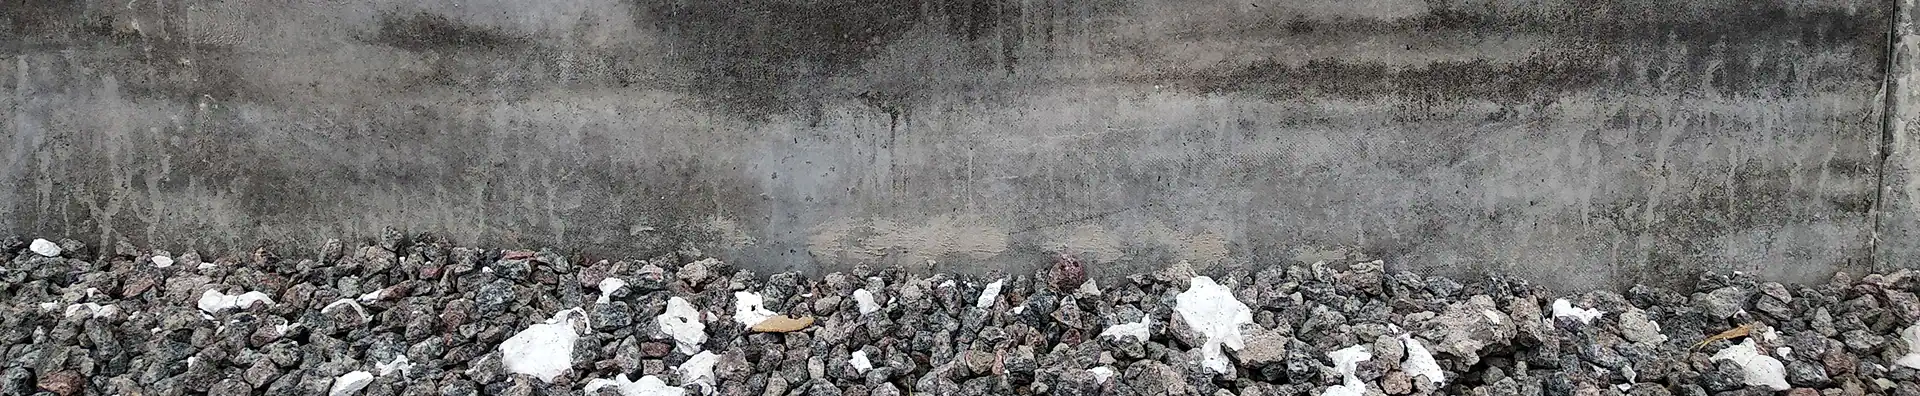
Efflorescence—that white, powdery substance on your foundation walls—tells you water is moving through your concrete. As water passes through, it brings minerals to the surface that crystallize. This isn’t just cosmetic. It means your foundation is porous enough for water to penetrate, and over time, this process degrades the concrete.
If you’re seeing any combination of these signs—multiple cracks, active water seepage, horizontal cracking, or bowing walls—the foundation needs more than a surface fix. These indicate structural stress that requires proper engineering solutions: crack injection, interior drainage systems, and potentially wall stabilization.
The longer you wait on foundation issues, the more expensive they become. A crack that could be sealed with injection today might require wall reconstruction next year. Water damage compounds quickly once it starts, affecting not just the foundation but floor joists, framing, and everything stored in your basement.
Testing Your Sump Pump Before Spring Storms Hit
Your sump pump is the last line of defense when water gets into your basement. But if it sat unused all winter, you don’t know if it works until you test it. And you don’t want to find out it’s broken during a storm.
Testing takes about five minutes. Locate your sump pump—it’s in a pit in the lowest part of your basement. Pour a bucket of water slowly into the pit. The float should rise, the pump should kick on, and water should discharge through the pipe leading outside. If all that happens and the pit drains quickly, your pump is working.
But pay attention to how it sounds and acts. A healthy pump makes a steady humming sound and clears water quickly. If you hear grinding, rattling, or loud vibrating, something’s wrong with the motor or impeller. If the pump runs but water doesn’t go down, the discharge line might be clogged or frozen.

When to Replace vs. Repair Your Sump Pump
Age is the biggest factor. Most sump pumps last seven to ten years depending on how often they run. If yours is approaching that age, replacement is smarter than waiting for it to fail. The cost difference between planned replacement and emergency replacement is minimal, but the water damage from a failed pump during a storm can run into thousands of dollars.
If your pump is cycling on and off constantly, even when it hasn’t rained, that’s a problem. It could be a stuck float switch, a check valve that’s allowing water to flow backward, or a pump that’s undersized for your water volume. Sometimes the switch can be replaced, but often continuous cycling means the pump itself is wearing out.
Rust on the pump housing or visible corrosion on electrical connections means the pump is deteriorating. Sump pumps work in wet environments, but they shouldn’t rust significantly if they’re functioning properly. Heavy rust indicates the protective coatings have failed and the pump is living on borrowed time.
If your pump won’t turn on at all, check the power first. Make sure it’s plugged in and the circuit hasn’t tripped. If power is fine but the pump won’t run, the motor has likely failed. Motor replacement usually costs nearly as much as a new pump, making replacement the better option.
Strange noises—grinding, squealing, or loud rattling—usually indicate mechanical failure inside the pump. The impeller might be damaged, bearings might be worn, or debris might be caught in the mechanism. While these can sometimes be repaired, if the pump is more than five years old, replacement gives you a fresh start with a warranty.
Look at your repair history. If you’ve had the pump serviced multiple times in recent years, you’re throwing good money after bad. Each repair costs $200-400 typically, and a new pump installed runs $800-1,500 depending on the model. After two or three repairs, you’ve paid for a new pump anyway.
Consider upgrading if your current pump barely keeps up during heavy rain. Long Island’s spring storms can dump inches of rain in hours. If your pump runs continuously during storms and you still see water accumulating, you need a higher-capacity pump or a backup system.
Battery backup systems are worth considering, especially in areas prone to power outages during storms. When you need your sump pump most—during severe weather—is exactly when power is most likely to fail. A battery backup ensures your basement stays protected even when the power goes out.
Professional Sump Pump Installation: What to Expect
Professional sump pump installation starts with assessment. A good contractor doesn’t just drop a pump in your existing pit and leave. We evaluate your basement’s low points, check how water enters and moves through your space, and size the pump appropriately for your water volume and the height it needs to pump.
The sump pit itself matters. It should be deep enough to hold adequate water but not so deep it’s below your foundation footer. Most pits are around two feet deep and 18-24 inches in diameter. If your existing pit is too small, the pump will cycle on and off too frequently, wearing out the motor prematurely.
A proper installation includes a check valve in the discharge line. This prevents water from flowing backward into the pit after the pump shuts off. Without a check valve, the pump has to re-pump the same water repeatedly, wasting energy and wearing out faster.
The discharge line should be properly sized—usually 1.5 to 2 inches in diameter—and should have a clear path to discharge water well away from your foundation. If the discharge dumps too close to your house, that water just cycles back into your basement. We make sure water discharges at least 10-20 feet from your foundation and slopes away.
Expect the installation to take a few hours for a straightforward replacement, or a full day if we’re creating a new pit or installing a backup system. We test the system thoroughly before we leave, running multiple cycles to ensure the pump activates at the right water level and discharges properly.
We’ll also explain maintenance to you. You’ll need to test your pump quarterly by pouring water in the pit, keep the pit clear of debris, and check the discharge line periodically to ensure it’s not clogged or frozen in winter.
A quality installation comes with a warranty on both the pump itself (usually from the manufacturer) and the installation labor. This gives you recourse if something goes wrong in the first year or two. Make sure you understand what’s covered and for how long.
Professional installation costs more than DIY, typically $800-1,500 for a standard pump replacement, but you’re paying for proper sizing, correct installation, and the knowledge that it’s done right. When you consider that a failed sump pump during one storm can cause $10,000+ in water damage, professional installation is insurance that pays for itself.
Protecting Your Long Island Home This Spring and Beyond
Spring maintenance isn’t about perfection. It’s about catching problems while they’re still manageable. That crack you spot in March can be sealed before April’s heavy rains. The sump pump that’s making odd noises can be replaced before it fails during a storm. The drainage issues you notice now can be fixed before they flood your basement.
Long Island’s combination of high water tables, aging homes, and unpredictable weather makes basement waterproofing and foundation maintenance essential, not optional. The homeowners who stay dry are the ones who address small problems before they become big ones.
If you’ve found issues during your spring inspection—foundation cracks that concern you, a sump pump that’s not performing right, or signs of water intrusion you can’t explain—it’s time to bring in someone who knows Long Island basements inside and out. We’ve spent 25 years protecting homes in Nassau and Suffolk Counties, completing over 500 projects with the kind of attention to detail that earns 150+ five-star reviews. We understand the soil conditions, water tables, and specific challenges that make your basement different from one in any other part of the country.
Article details:
- Published by:
- Diamond Masonry & Waterproofing
- Published to:
- Last modified:
- May 5, 2026
Share:
Continue learning: